Assignment 7
Displaying big images as tiles
Choose a satellite or aerial image and generate a tile cache in ArcGIS Pro to publish as a web service in ArcGIS Online. This exercise will use a satellite image of New Orleans after Hurricane Katrina but you may optionally find your own image. You do not need to create a map or app, only publish the tile layer in ArcGIS Online.
ArcGIS Online does not currently support image services, so a tile layer is the only way to host imagery on ArcGIS Online (ArcGIS Enterprise supports image services).
Table of Contents
Data
You can either download the example image below or, optionally, see the Appendix to download a different image from EarthExplorer.
The example image was taken by OrbView-3, a high-resolution satellite that captured an image of New Orleans on August 30, 2005, the day after Hurricane Katrina flooded the city. It was downloaded from USGS EarthExplorer but you can download it directly below. You will need to extract the contents of the zip file to a folder on your computer.
3V050830P0000872681A520008501132M_001631981_1GST.ZIP (235 MB)
As far as imagery datasets go, this single scene is small and won’t take too long to process into tiles, but it is still too large at 235 MB to include directly on a web map without tiling.
Steps
- Open ArcGIS Pro and create a new project. If needed, Connect to a folder, such as your Downloads folder in Windows. This will let you browse for your downloaded satellite image.
-
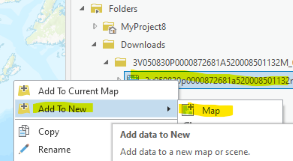
Expand the folder you connected in the
Catalogpane to find your satellite image. You can right click the image and chooseAdd To New>Map, or drag and drop the layer into the current map viewer. ClickOKif prompted about pyramids and statistics.
Layers can be added to the current map by dragging and dropping or right-click Add To New > Map. - When you add the image to the map, the view should zoom to the image extent. Make sure it is located in the correct place on Earth. The image layer now also appears in the
Contentspane above the basemaps. -
Uncheck the boxes next to the basemap layers to hide them.
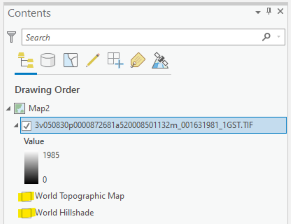
Image layer listed in the Contents pane. Hiding the basemap will prevent it from being tiled with our image. -
If your image has a black or white background, make its background transparent. Right-click the layer in the
Contentspane, clickSymbology, clickMask, then checkDisplay background value.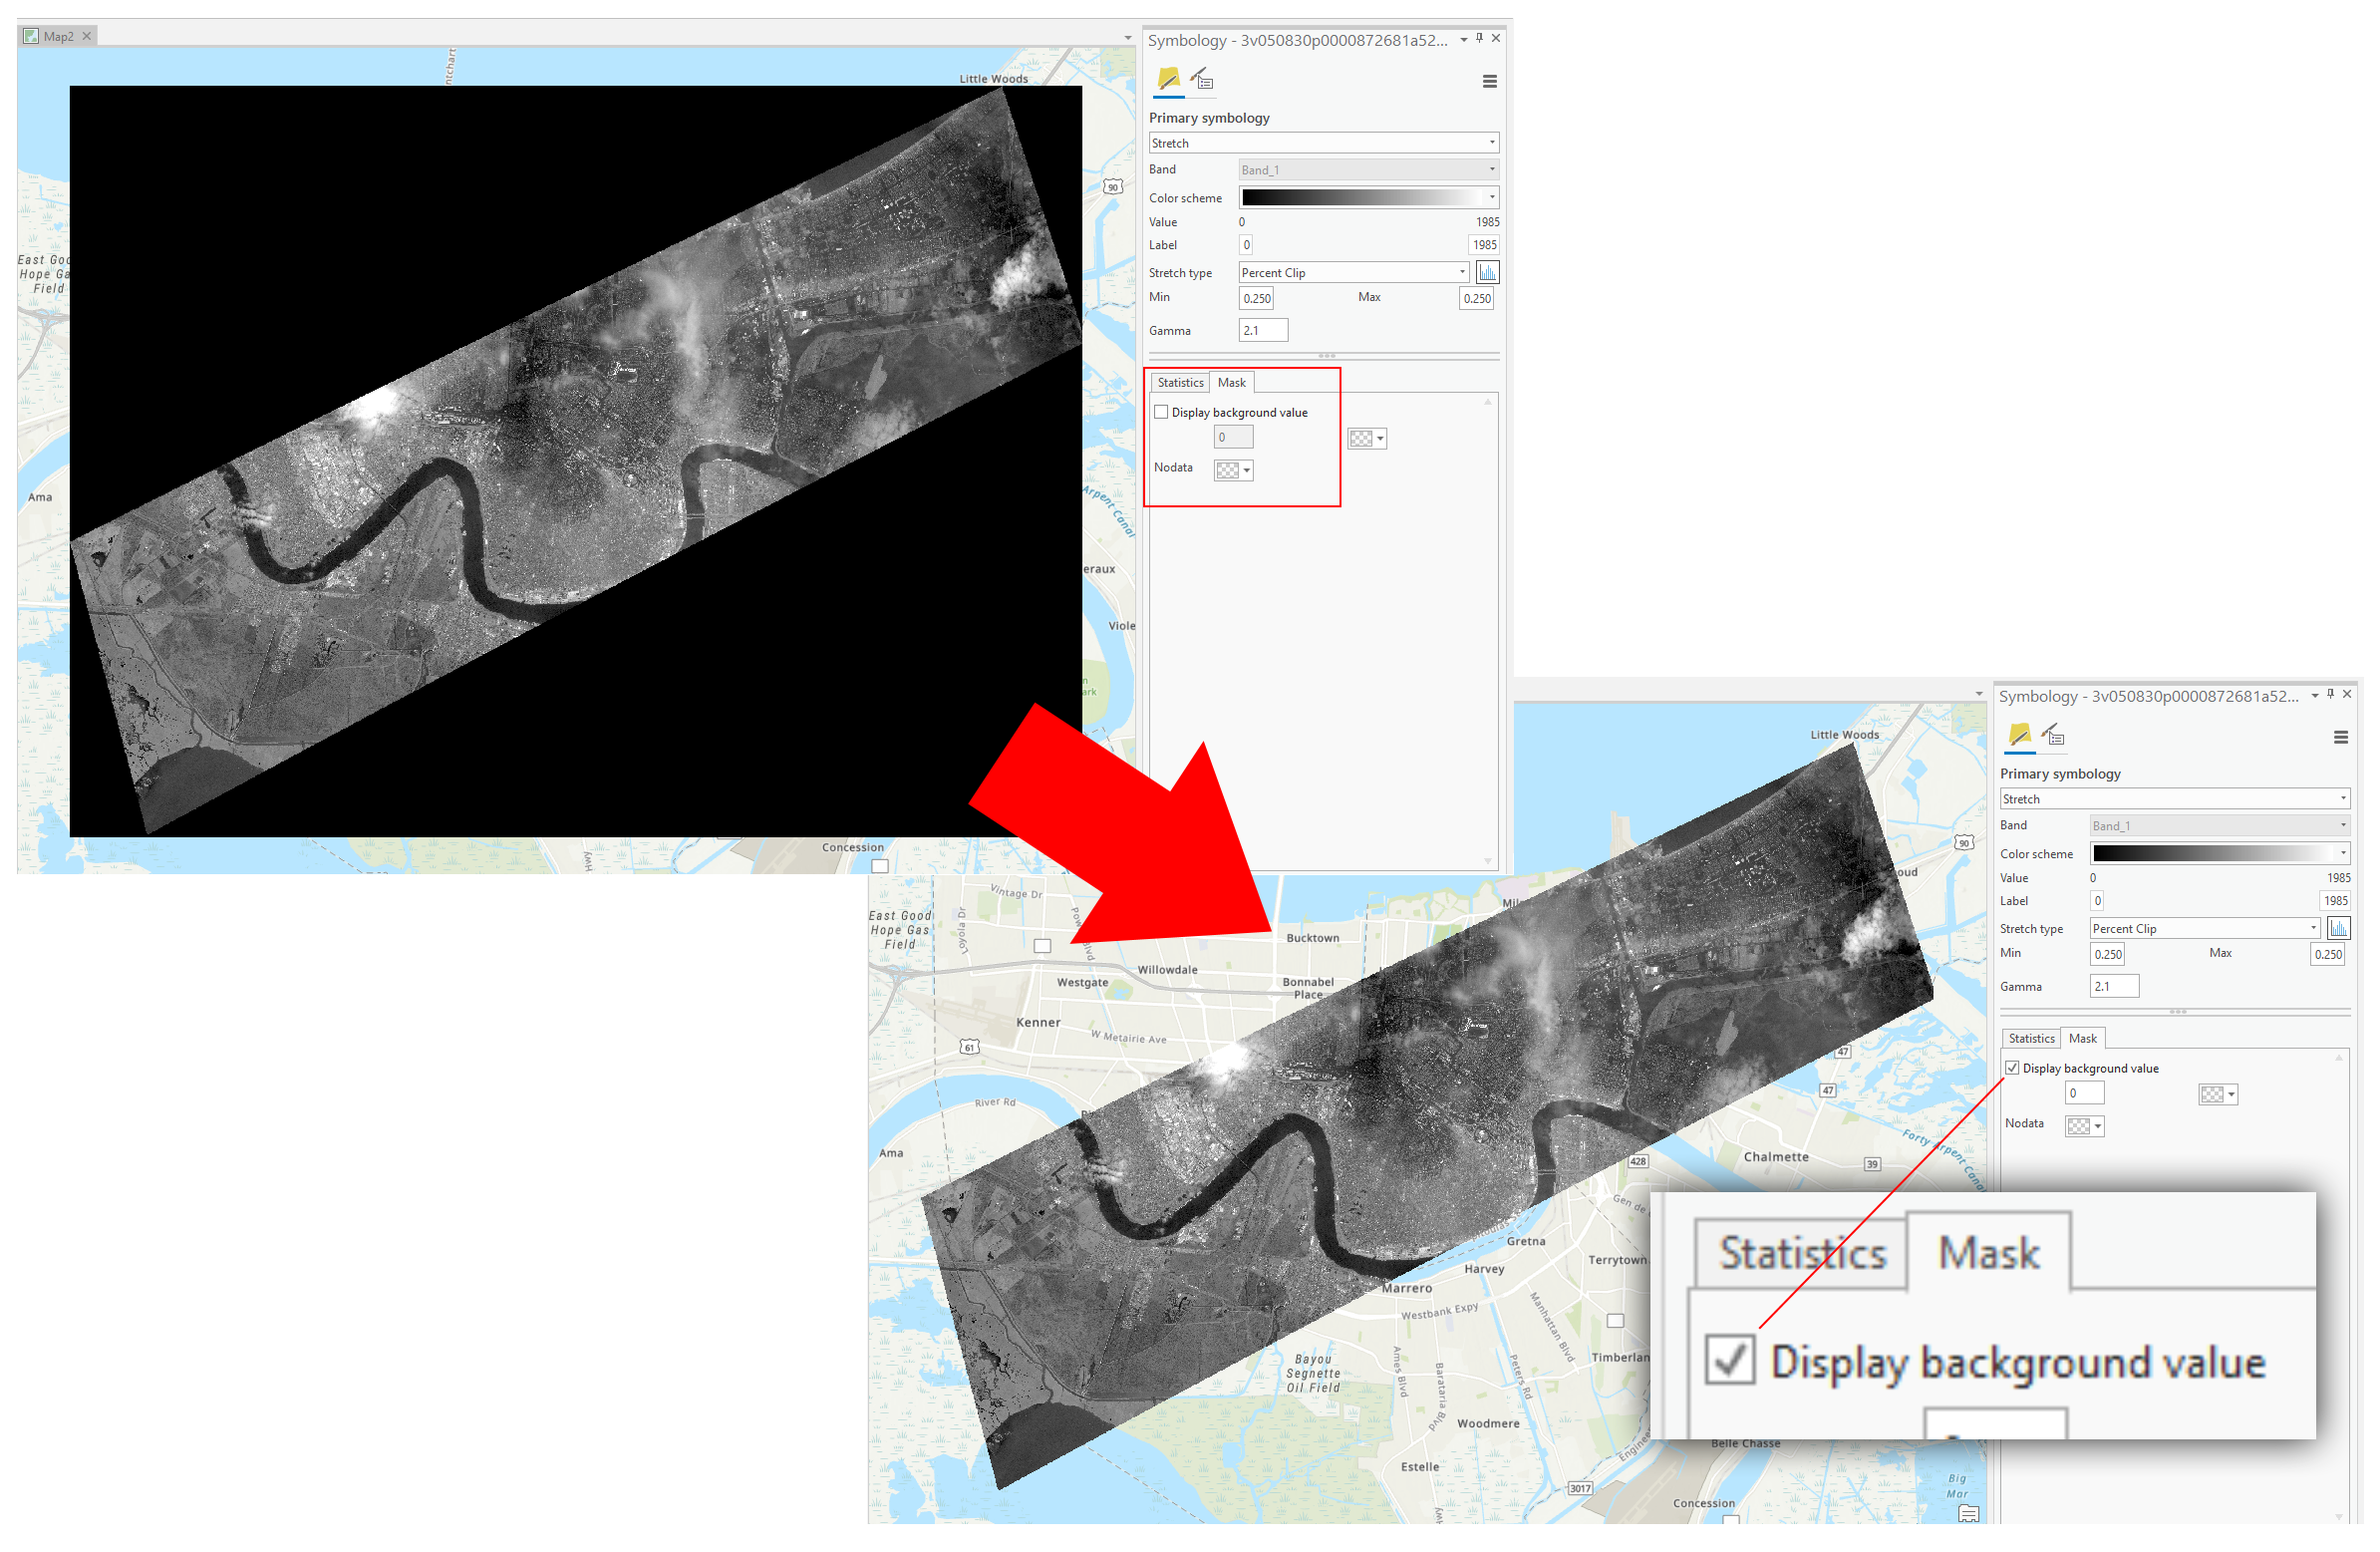 Hide the collar/background of your image, if it has one.
 -
Within ArcGIS Pro, sign into your ArcGIS Online account.
In ArcGIS Pro, sign in using your ArcGIS Online account. -
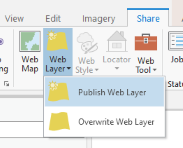
On the top ribbon, click
Share>Web Layer>Publish Web Layer.
Publishing a layer will give you the option to save a tile cache to ArcGIS Online. -
In the
Share As Web Layerpane, set the following options. It is especially important to chooseCache locallyunder theConfigurationtab (right image below), and underLevels of Detail, drag the sliders to include levels 0 through 17. Note how many tiles will be generated; you will put that on the Item Details page later.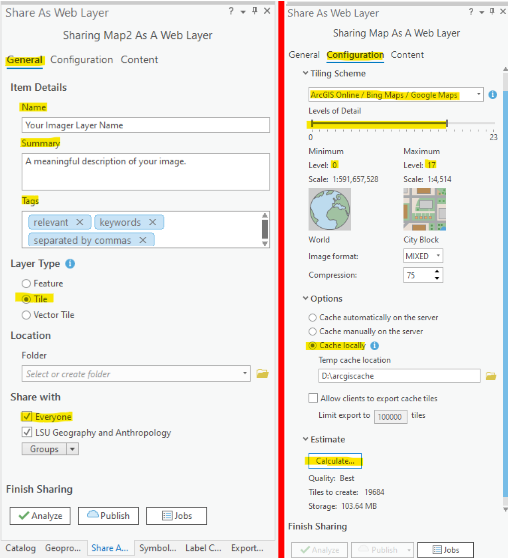
Publishing a layer will give you the option to save a tile cache to ArcGIS Online. - Look at the
Estimateto make sure the estimated file size is within expectations, 100-200 MB for the example OrbView image. The tile cache will take up this much space on your computer, and then will be uploaded to ArcGIS Online where it will consume credits, so it is important to make sure it is not too large. - Still in the
Share As Web Layerpane, clickAnalyzeto detect errors. If there are none (warnings are OK), clickPublish. This process can take several minutes. - Once finished, you will be given a link to see your tile layer’s Item Details page in ArcGIS Online. You can also find it in your
Contentin ArcGIS Online. In addition to the tile layer, there will be a tile package item, which you can leave private. You can add your layer to a new map in ArcGIS Online and take a screenshot. - Add a screenshot and any missing details on the Item Details page and also say:
a. How many tiles were generated
b. The zoom level range for which tiles were generated - Copy a link to the page using the social icons on the right side of the page:

Get the link to your Item Details page by clicking the Link icon.
Checklist
- A tile layer hosted on ArcGIS Online publicly.
- Item Details page with basic information about the image and:
a. Screenshot as thumbnail
b. Zoom levels for which tiles were generated
c. Total number of tiles generated
Submit
- The URL to the Item Details page of your hosted tile layer. Example:
https://www.arcgis.com/home/item.html?id=ABC123orhttps://arcg.is/ABC123
Appendix
Downloading your own imagery
There are many websites to download remote sensing imagery. This appendix will use USGS EarthExplorer. Earth Explorer lets you search for images from a variety of satellites and aerial missions by specifying a location on the map and a date range. You will have to create an account to download images.
- Go to the EarthExplorer website at https://earthexplorer.usgs.gov and sign in.
-
Pan/zoom the map to an area of interest and click the map to place a marker. The search will only return images that cover the marker. It also lets you mark multiple points to draw a search area.
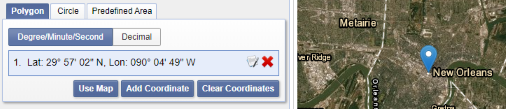
The point or polygon that you mark on the map will limit your search results to only include images that intersect with your point or polygon. This example will return images of downtown New Orleans. - If helpful, enter a date range. This tutorial uses
08/29/2005to09/30/2005to find images taken within a month after Hurricane Katrina. - After specifying a location and date, click
Data Sets. Here you can choose specific satellites or aerial imagery programs, a selection that requires some knowledge to find meaningful results, but here are some possibilities to get started (OrbView-3 is selected for this tutorial because it captured an image the day after Katrina struck New Orleans).- Commercial Satellites - IKONOS, OrbView, SPOT
- EO-1 - EO-1 ALI
- Landsat - Landsat Collection 1 Level-1 - Select all
- Sentinel - Sentinel-2
-
Click
Resultsto see a dropdown menu of satellites. Look through the different satellites in the dropdown menu to see which, if any, returned results for your location/dates. If there are no results, choose more data sources, expand your date range, choose a new area, or any combination of those.
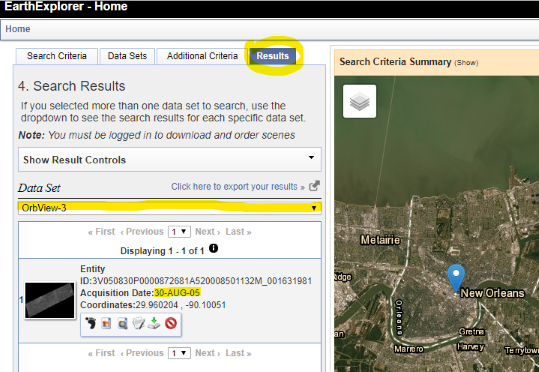
This search for post-Katrina imagery yielded 1 result for the OrbView-3 satellite. - In the
Results, note the icons under each result. These let you view the image footprint, preview, and metadata. There is also an icon to download the image. You will have to log in before downloading images. - After the download completes, you should have a zip file on your computer. You must unzip the file to a folder, then you can add the image to a map in ArcGIS Pro.
↑ Top
← Back to Assignments